Attic fan installation guide lower energy bills
Attic Fan Installation Guide: Lower Your Energy Bills the Smart Way
Reading time: 14 minutes
Here’s a scenario most homeowners know too well: It’s a sweltering July afternoon, your air conditioner is running full blast, and your electricity bill is quietly climbing toward numbers that make you wince. You’ve heard about attic fans, maybe even looked them up once or twice, but never quite pulled the trigger. Sound familiar?
Well, here’s the straight talk: Installing an attic fan is one of the most cost-effective home improvements you can make in 2026. With residential electricity rates averaging $0.17 per kilowatt-hour nationally — up roughly 6% from 2025 — and summer temperatures continuing to break records, the math on attic ventilation has never been more compelling. A properly installed attic fan can reduce attic temperatures by 30 to 50°F and cut cooling costs by up to 30%.
This guide walks you through every step: choosing the right fan, understanding the installation process, navigating safety requirements, and calculating your real-world savings. Whether you’re a seasoned DIYer or picking up a drill for the first time, we’ll turn this project from intimidating to entirely achievable.
Table of Contents
- Why Attic Fans Actually Work
- Types of Attic Fans: Choosing the Right One
- Tools and Materials You’ll Need
- Step-by-Step Installation Guide
- Solar vs. Electric: A Head-to-Head Comparison
- Common Challenges and How to Overcome Them
- Calculating Your Real Energy Savings
- Frequently Asked Questions
- Your Cooling Cost Roadmap: Next Steps
Why Attic Fans Actually Work
Before you invest time and money, it helps to understand why attic ventilation matters so profoundly. Think of your attic as a heat sponge. During summer months, solar radiation heats your roof surface to temperatures that can reach 150–170°F. That heat radiates downward through your ceiling insulation and into your living space — forcing your AC system to work overtime just to compensate.
An attic fan actively exhausts this superheated air, pulling in cooler outside air through soffit vents and creating a continuous airflow loop. According to a 2025 study by the Lawrence Berkeley National Laboratory, homes with inadequate attic ventilation consumed an average of 18% more cooling energy compared to well-ventilated equivalents. That’s not a marginal difference — that’s a meaningful, bill-changing gap.
“Attic temperature management is one of the most underutilized strategies in residential energy efficiency. For most American homes, it’s low-hanging fruit with a payback period under three years.” — Dr. Sarah Hendricks, Building Science Researcher, Oak Ridge National Laboratory, 2025
The Stack Effect Explained
Physics is working in your favor here. Hot air naturally rises, and when your attic fan creates negative pressure at the top of your home, it accelerates what building scientists call the stack effect. Cool air enters through low soffit vents, travels through the attic space, absorbs heat, and exits through the powered fan. The result is a self-reinforcing cycle that, on a mild day, can make air conditioning almost entirely unnecessary.
Consider the case of Marcus and Diane Pemberton in Phoenix, Arizona. In summer 2025, they installed a two-speed solar-powered attic fan on their 2,200-square-foot ranch-style home. Their July electricity bill dropped from $387 to $261 — a savings of $126 in a single month. Over the cooling season (May through October in Phoenix), they estimated saving over $600, with the fan fully paid off within its first operational year.
Types of Attic Fans: Choosing the Right One
Not all attic fans are created equal, and matching the right type to your home’s specific needs is the first critical decision you’ll make. Here’s how they break down:
Roof-Mounted vs. Gable-Mounted Fans
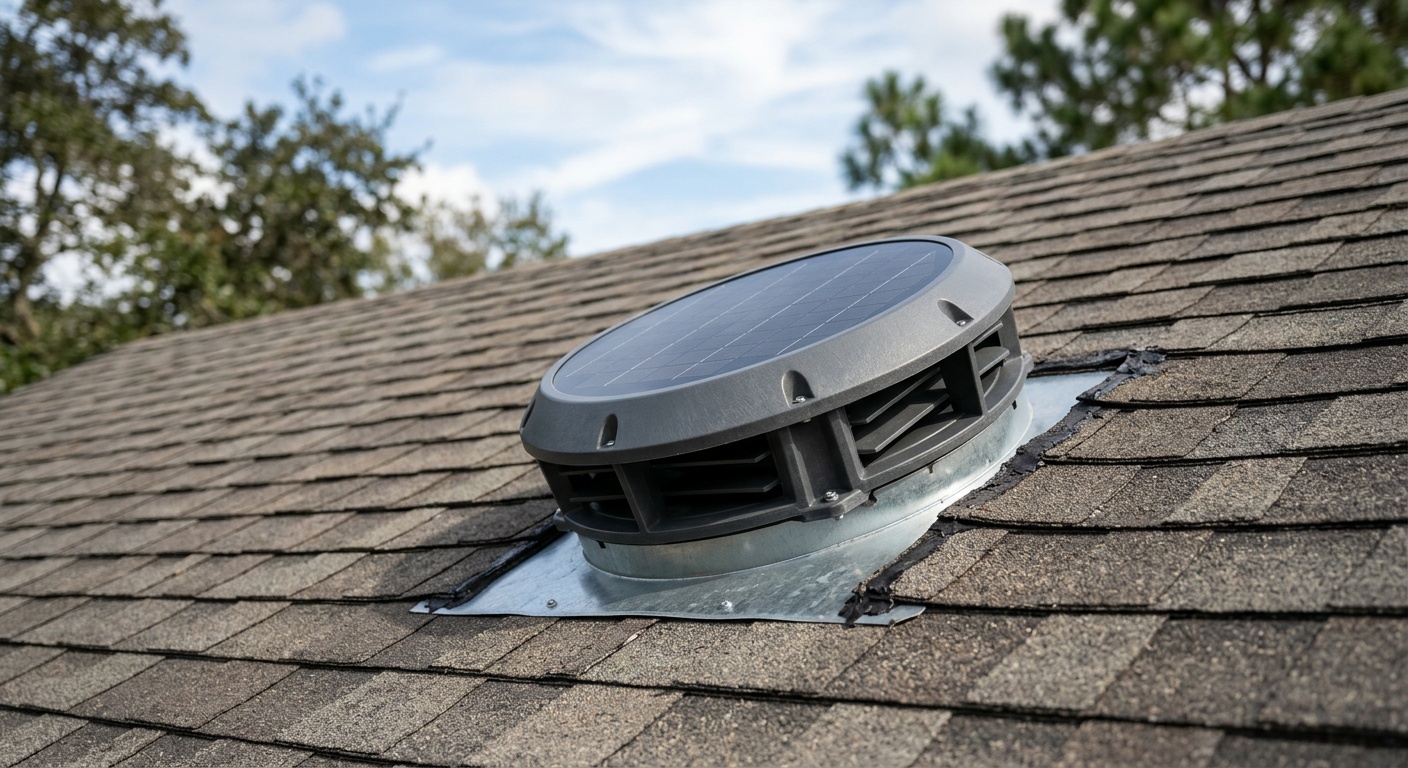
Roof-mounted fans are installed directly on the roof deck, typically near the ridge. They offer powerful, direct airflow and are generally more efficient because they exhaust air at the highest point of the attic — where heat concentrates most intensely. The tradeoff? Installation is more complex, involves cutting through roofing material, and requires waterproofing around the mount.
Gable-mounted fans are installed in the triangular gable end wall of your attic. They’re significantly easier to install — no roof penetration required — and can be accessed from inside the attic without ladder work on the roof surface. However, they’re slightly less efficient because they pull air horizontally rather than from the peak.
Whole-house fans deserve a mention here too. While technically installed in the ceiling rather than the attic, they work in concert with attic ventilation to pull cool evening air through open windows and exhaust it through the attic. They’re particularly effective in climates with significant day-night temperature swings.
Fan Sizing: CFM Matters
Cubic Feet per Minute (CFM) is the metric that determines whether your fan is appropriately sized for your attic. The standard formula is straightforward:
- Calculate your attic’s square footage
- Multiply by 0.7 for standard pitch roofs (up to 6:12 pitch)
- Multiply by 1.0 for steeper pitch roofs (7:12 and above)
- The result is your minimum required CFM rating
For a 1,500 sq ft attic with a standard pitch, you’d need a fan rated at minimum 1,050 CFM. Most residential fans range from 1,000 to 1,600 CFM, so don’t skimp on sizing — undersized fans work harder, wear out faster, and deliver disappointing results.
Tools and Materials You’ll Need
Preparation is half the battle. Walking through a successful installation in your head before you pick up a tool saves significant frustration later. Here’s your complete toolkit:
Essential Tools
- Reciprocating saw or jigsaw — for cutting the roof or gable opening
- Drill with assorted bits — including a long spade bit for pilot holes
- Screwdrivers (flathead and Phillips)
- Wire strippers and voltage tester
- Caulking gun with roofing sealant
- Measuring tape and chalk line
- Safety glasses, dust mask, and work gloves
- Sturdy attic ladder or pull-down stair access
Materials List
- Attic fan unit (with thermostat/humidistat control)
- Roofing nails and flashing (for roof-mounted units)
- Roofing cement or silicone sealant
- Electrical cable (14/2 or 12/2 depending on circuit)
- Junction box and wire connectors
- Circuit breaker (if adding a dedicated circuit)
Pro Tip: In 2026, most premium attic fan units from brands like QuietCool, Master Flow, and iLiving come with pre-wired thermostatic controls that automatically activate when attic temperatures exceed a set threshold (typically 100–110°F) and shut off when temperatures drop. This “set it and forget it” feature isn’t optional — it’s essential for maximizing efficiency without manual intervention.
Step-by-Step Installation Guide
We’ll walk through a roof-mounted electric attic fan installation — the most common residential choice. Adjust steps accordingly for gable-mounted units.
Phase 1: Safety and Preparation
Step 1: Turn off power to the relevant circuit. Before doing anything electrical, go to your breaker panel and cut power to the attic or any nearby circuits. Use a voltage tester to confirm the lines are dead before touching them. This is non-negotiable.
Step 2: Assess your attic’s ventilation intake. A common mistake is installing a powerful exhaust fan without adequate intake ventilation. Your soffit vents need to provide at least 1 square foot of net free area for every 150 square feet of attic floor space. If you don’t have sufficient soffit vents, the fan will create negative pressure that can actually pull conditioned air from your living space — the opposite of what you want.
Step 3: Choose your installation location. For roof-mounted fans, target an area approximately one-third down from the ridge, away from existing roof penetrations. The location should be accessible from inside the attic and, ideally, centered over the attic floor space. Avoid valleys, hips, or areas near skylights.
Phase 2: Cutting the Opening
Step 4: Mark the opening from the inside. From inside the attic, use your chalk line to mark a circle matching your fan unit’s mounting hole diameter (typically 14 to 16 inches). Drive a nail through the center of this circle so you can find it from outside on the roof.
Step 5: Transfer the mark to the roof exterior. Carefully climb onto the roof (use proper fall protection — a roof ladder hook or safety harness) and locate your center nail. Use the fan’s mounting template or measure out from the nail to mark your cutting circle.
Step 6: Cut the opening. Using your reciprocating saw or jigsaw, carefully cut along the marked circle. Work slowly to avoid cutting through rafters. If you encounter a rafter, stop — you’ll need to adjust your location slightly or frame around it.
Important Safety Note on Roof Work
In 2026, OSHA guidelines for residential DIY roof work recommend a minimum 3-point contact at all times. If your roof pitch exceeds 6:12 or if surfaces are wet, defer to a professional. Attic fan installation costs $150–$350 for professional labor — a reasonable safety investment if conditions aren’t ideal.
Phase 3: Mounting the Fan
Step 7: Install the flashing. Slide the fan’s integrated flashing or a separate aluminum flashing collar under the shingles above the opening and over the shingles below. This layered arrangement ensures water sheds away from the penetration rather than into it.
Step 8: Secure the fan housing. Position the fan unit in the opening, ensuring the flashing is properly seated. Fasten with roofing nails through the flashing into the roof deck (not through shingles — you’d compromise the weatherproofing). Apply a generous bead of roofing cement or silicone around all edges of the flashing.
Step 9: Connect the wiring. From inside the attic, run your electrical cable from the nearest appropriate junction box to the fan’s wiring location. Most modern attic fans use standard 120V residential wiring. Connect black-to-black (hot), white-to-white (neutral), and green or bare copper to the ground wire. Secure connections with wire nuts and wrap with electrical tape.
Phase 4: Testing and Calibration
Step 10: Set your thermostat. Before restoring power, set the thermostat control to your preferred activation temperature. The sweet spot for most climates is 100–105°F. Set it too low and the fan runs unnecessarily; too high and it’s reactive rather than preventive.
Step 11: Restore power and test. With power restored, manually trigger the thermostat (or use a heat gun near the sensor) to confirm operation. Listen for smooth, vibration-free operation. A rattling fan usually indicates loose mounting hardware — address this before the first real heat cycle.
Solar vs. Electric: A Head-to-Head Comparison
One of the biggest decisions you’ll make is the power source. Both options have legitimate advantages depending on your situation.
| Feature | Solar-Powered Fan | Electric (Hardwired) Fan |
|---|---|---|
| Average Unit Cost (2026) | $180–$450 | $60–$250 |
| Operating Cost | $0 (free energy) | $15–$40/season |
| Installation Complexity | Low (no wiring needed) | Moderate (requires wiring) |
| CFM Performance | 800–1,400 CFM | 1,000–1,800 CFM |
| Typical Payback Period | 2–4 years | 1–3 years |
The solar option’s biggest advantage isn’t just the zero operating cost — it’s the synchronization. Solar fans operate most powerfully exactly when you need them most: during peak sun hours when attic temperatures are highest. On cloudy days when temperatures are moderate, they slow down naturally. That’s elegant, automatic efficiency.
Electric fans, however, can operate at night or on cloudy days, giving you more control — particularly valuable for homeowners using whole-house fans to pull in cool evening air. They also generally outperform solar on pure CFM output.
Common Challenges and How to Overcome Them
Even well-planned installations hit snags. Here are the three most frequent problems and how to navigate them strategically.
Challenge 1: Inadequate Soffit Ventilation
You install a 1,500 CFM fan but notice no real temperature improvement, and worse, your indoor air feels stuffy. This is the intake problem. A powerful exhaust fan with insufficient intake venting creates negative pressure that pulls conditioned air from your living space through ceiling gaps, recessed light fixtures, and attic hatches.
Solution: Before installing your fan, calculate your net free vent area (NFVA). Add soffit vent strips along your eaves if necessary — they’re inexpensive ($8–$15 per linear foot installed) and dramatically improve system performance. Also, ensure your attic insulation isn’t blocking soffit vents; use rafter baffles to maintain a clear airway.
Challenge 2: Electrical Circuit Capacity
Many older homes have limited electrical infrastructure in the attic area. Trying to tap into an overloaded circuit is both inefficient and potentially dangerous.
Solution: Have your panel assessed before installation. A licensed electrician can add a dedicated 15-amp circuit for your attic fan for $200–$400 — a reasonable cost that ensures clean, safe power delivery. Alternatively, solar-powered fans sidestep this issue entirely, which is one reason they’ve surged in popularity.
Challenge 3: Leaking Around the Fan Mount
Water intrusion around a poorly sealed roof penetration is a serious issue that can cause structural damage and mold growth. This is where rushed DIY installations often fail.
Solution: Never skip the flashing step, and always use purpose-formulated roofing sealant rated for outdoor temperature extremes. Apply sealant in a continuous bead — no gaps. Inspect the seal after the first significant rainfall and reapply if you notice any cracking or separation. On tile or metal roofs, consider professional installation, as these substrates require specialized flashing techniques.
Calculating Your Real Energy Savings
Let’s move beyond vague percentages and calculate what an attic fan could actually mean for your household budget in 2026.
Here’s a representative energy savings visualization across different home sizes, based on current national average electricity rates:
Estimated Annual Cooling Cost Savings by Home Size
Estimates based on $0.17/kWh national average, hot-climate cooling season of 5 months, 20–25% AC load reduction from attic fan. Results vary by climate zone, insulation quality, and home construction.
What does this mean in practical terms? For a typical 2,000-square-foot home in a warm-climate state like Texas, Georgia, or Florida, an attic fan costing $200 installed could realistically pay for itself in approximately 12 to 18 months. Over a 10-year lifespan — the standard warranty period for most quality units — you’re looking at a net savings of $1,750 or more.
Also worth noting: in 2026, the federal Residential Clean Energy Credit still offers a 30% tax credit for solar-powered attic fans installed as part of broader home energy efficiency improvements, under the extended provisions of the Inflation Reduction Act. That turns a $350 solar fan into an effective cost of $245 after credit — making the payback math even more attractive.
Frequently Asked Questions
Can I install an attic fan myself, or do I need a licensed contractor?
For a gable-mounted or solar-powered roof-mounted fan, most competent DIYers can handle the installation in a single afternoon. The work is straightforward if you’re comfortable with basic carpentry and, for electric units, elementary residential wiring. However, if your installation requires adding a new circuit, you’ll need a licensed electrician for the panel work in most U.S. jurisdictions — this is both a code requirement and a safety consideration. When in doubt, pull a permit; attic fan installations generally fall under minor electrical or mechanical work permits, which cost $25–$75 and provide important protection and inspection oversight.
Will an attic fan interfere with my HVAC system or ductwork?
This is an excellent and often overlooked question. If your HVAC ductwork runs through the attic — as it does in many homes built before 2000 — an attic fan can actually help by keeping duct temperatures lower, reducing heat gain into your conditioned air supply. However, if your home’s attic is part of the conditioned envelope (i.e., insulation is at the roofline rather than the floor), a standard attic fan is inappropriate and could create pressure imbalances. In those homes, you need an energy recovery ventilator (ERV) or a conditioned crawlspace approach instead. When in doubt, consult a building performance contractor for an energy audit before installation.
How do I maintain an attic fan to ensure it lasts 10+ years?
Attic fans require surprisingly minimal maintenance, but a few annual tasks make a significant difference in longevity. At the beginning of each cooling season: clean the fan blades and housing of dust and debris (a vacuum with brush attachment works perfectly); lubricate the motor bearings if your unit has oil ports (a few drops of non-detergent motor oil annually); inspect the roof flashing and sealant for cracking; and test the thermostat accuracy using a simple oven thermometer held near the sensor. Additionally, clear your soffit vents of insulation or debris each fall. With this simple annual routine, most quality attic fans will easily exceed their 10-year warranties.
Your Cooling Cost Roadmap: Next Steps
You now have everything you need to move from awareness to action. The energy savings are real, the installation is achievable, and the timeline to recoup your investment is measured in months rather than years. Here’s your actionable roadmap:
- Assess your attic this week. Spend 15 minutes measuring your attic square footage and checking your existing soffit ventilation. This single step determines your fan size and identifies any prep work needed.
- Choose your fan type and budget. Solar if you want zero operating cost and easy installation; electric if you want maximum CFM and nighttime capability. Set a budget of $150–$450 including all materials.
- Schedule your installation on a mild day. Avoid peak summer — working in a hot attic during July is miserable and unsafe. Target a spring or early fall day when attic temperatures are manageable.
- Document before and after. Take a photo of your electricity bill the month before installation. Compare it to the same month next year. The data will be more motivating than any statistic in this article.
- Explore the tax credit opportunity. If you’re choosing solar, confirm your eligibility for the 30% federal Residential Clean Energy Credit with your tax preparer before filing your 2026 return.
The broader picture here matters too: as climate patterns continue to push summer temperatures to new extremes and electricity costs rise with grid demand, passive and low-energy cooling solutions like attic ventilation are shifting from “nice to have” to genuinely strategic home investments. Homeowners who make these improvements in 2026 are positioning themselves ahead of what building scientists increasingly predict will be higher baseline cooling costs through the late 2020s and beyond.
You’ve now got the knowledge. The only remaining question is: How much money are you willing to leave on the table by waiting one more summer?
Article reviewed by Mike O’Brien, Drywall Installation & Surface Finishing Specialist, on June 8, 2026