Attic Fan Installation Guide for Maximum Whole House Cooling
Attic Fan Installation Guide for Maximum Whole House Cooling
Reading time: 14 minutes
It’s July 2026, and your energy bill just hit a number that made you do a double-take. Sound familiar? With U.S. average summer temperatures continuing their upward trend and residential cooling costs climbing nearly 18% since 2023, homeowners across the country are hunting for smarter, more cost-effective ways to beat the heat. Enter the attic fan — one of the most underrated, high-impact home improvements you can make this season.
Here’s the straight talk: A properly installed attic fan doesn’t just cool your attic. It fundamentally transforms how your entire home manages heat. Think of it as giving your house a respiratory system — one that actively exhales scorching trapped air and draws in cooler outdoor air at a fraction of what your central AC costs to run.
Whether you’re a weekend DIY warrior or someone considering hiring a professional for the first time, this guide walks you through every step with precision and clarity. Let’s turn that sweltering attic into a strategic cooling asset.
Table of Contents
- Understanding Attic Fans: Whole House vs. Attic-Only Systems
- Planning Your Installation: Sizing, Placement, and Code Compliance
- Tools and Materials You’ll Need
- Step-by-Step Installation Walkthrough
- Common Challenges and How to Overcome Them
- Optimizing Performance for Maximum Whole House Cooling
- Attic Fan Types: A Side-by-Side Comparison
- Energy Savings and ROI: What the Numbers Say in 2026
- Frequently Asked Questions
- Your Cool Home Action Plan: Next Steps
Understanding Attic Fans: Whole House vs. Attic-Only Systems
Before you buy a fan or pick up a drill, it’s critical to understand what type of system will actually solve your problem. Many homeowners make the mistake of purchasing an attic-only ventilation fan when what they truly need is a whole house fan — and vice versa. These are fundamentally different systems with different installation requirements, costs, and performance outcomes.
Attic Ventilation Fans: The Targeted Heat Fighters
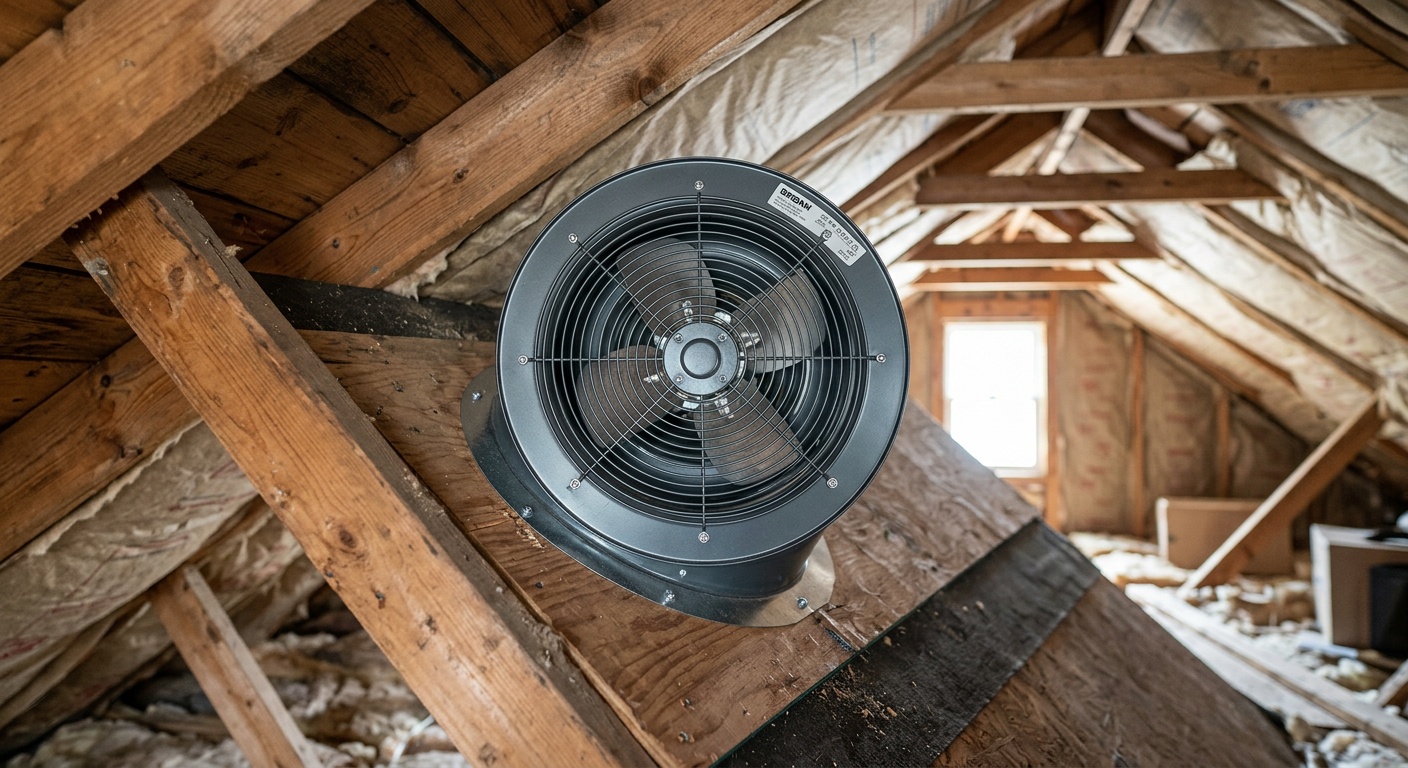
An attic ventilation fan (sometimes called a power attic ventilator or PAV) is mounted on the roof or gable wall and works by actively exhausting superheated air from the attic space. In summer, attic temperatures routinely reach 140–160°F in 2026’s climate conditions. This heat radiates downward through your ceiling, forcing your air conditioner to work harder and longer.
Attic fans operate independently of your living space. They pull air in through soffit vents and push the hot air out, keeping attic temperatures closer to outdoor ambient levels. They’re typically smaller (1,000–1,600 CFM) and consume between 75–400 watts depending on model type.
Whole House Fans: The Whole-Home Game Changers
A whole house fan is installed in the ceiling between your living space and attic. When operated — typically in the early morning or evening when outdoor temperatures drop — it draws cool outdoor air through open windows, circulates it through your home, and exhausts the warm indoor air into the attic and out through roof vents. These systems move massive volumes of air, typically 3,000–7,000 CFM, and can replace all the air in your home in 3–4 minutes.
According to the Lawrence Berkeley National Laboratory’s 2025 Residential Ventilation Study, whole house fans can reduce cooling energy consumption by 50–90% during mild weather periods when used strategically. That’s not a typo — the right fan, used correctly, can essentially eliminate your AC usage on days when outdoor temperatures are favorable.
Quick Scenario: Imagine you live in Sacramento, California. Summer days hit 98°F, but evenings cool down to 65°F. A properly sized whole house fan lets you purge the heat accumulated during the day in minutes, pre-cooling your home for overnight comfort without ever touching your thermostat. Homeowners in the Central Valley reported saving an average of $340/year on cooling costs in 2025 using this strategy alone.
Planning Your Installation: Sizing, Placement, and Code Compliance
Great installation starts with great planning. Rushing into this step is where most DIY projects go sideways — and with attic fans, an undersized or improperly placed unit means you’ve spent money and effort for minimal gain.
Calculating the Right Fan Size
Fan sizing is measured in CFM (Cubic Feet per Minute) — the volume of air moved per minute. Here’s how to calculate your needs:
For Whole House Fans: Multiply your home’s square footage by a factor of 2–3 (for standard 8-foot ceilings). Aim for the higher end if you live in a hot, humid climate.
- Example: 2,000 sq ft home × 2.5 = 5,000 CFM minimum fan rating
- For homes with 9–10 ft ceilings, multiply square footage × 3–4
- Add 15% capacity if you have a finished attic or bonus room
For Attic Ventilation Fans: The general rule is 0.7 CFM per square foot of attic floor space for a moderately vented attic, or 1.0 CFM per square foot for a poorly vented attic.
- Example: 1,400 sq ft attic with poor ventilation: 1,400 × 1.0 = 1,400 CFM fan needed
Placement Best Practices
For whole house fans, placement in a central hallway ceiling offers the most balanced airflow across all rooms. Avoid installing directly above bedrooms if noise is a concern — modern two-speed and variable-speed fans have dramatically reduced this issue by 2026, but placement still matters.
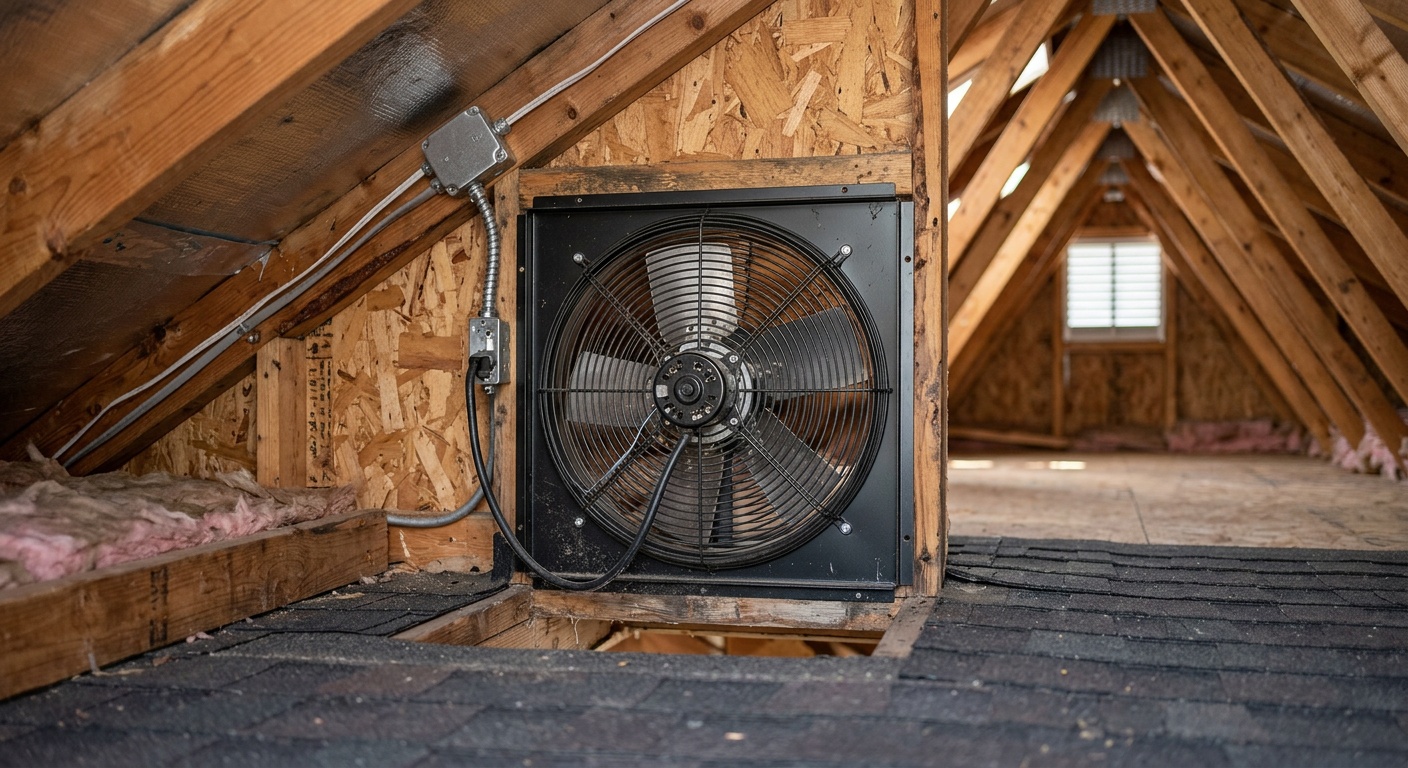
For attic ventilation fans, gable-mounted fans work well in most attics and are significantly easier to install than roof-mounted units. Roof-mounted fans require flashing and waterproofing work that adds complexity and cost. Solar-powered gable fans have surged in popularity through 2025–2026 as panel efficiency has improved to the point where they can run at full power on partially cloudy days.
Code Compliance and Permits
Don’t skip this step. In 2026, most U.S. municipalities require a permit for whole house fan installation because it involves electrical work and structural modification. Key considerations include:
- NEC (National Electrical Code) 2023 compliance — now adopted in 47 states, requiring AFCI protection on fan circuits in residential applications
- Attic ventilation ratios — IRC (International Residential Code) requires 1 sq ft of net free ventilation area per 150 sq ft of attic floor space, which your fan installation must account for
- Fire damper requirements — Some jurisdictions require automatic fire dampers on whole house fan installations; check your local AHJ (Authority Having Jurisdiction)
Pro Tip: Call your local building department before purchasing. Ask specifically whether your planned installation requires a permit and if inspections are required. Getting this right from the start saves significant headaches later.
Tools and Materials You’ll Need
Having the right gear ready before you start is the difference between a smooth Saturday project and a week-long ordeal. Here’s your complete toolkit:
Tools Required:
- Reciprocating saw or jigsaw (for ceiling/gable cutout)
- Drill with assorted bits
- Wire stripper and voltage tester (non-contact type strongly recommended)
- Stud finder
- Tape measure and chalk line
- Level
- Safety glasses, N95 respirator (for attic insulation), and work gloves
- Knee boards or attic ladder (never step between joists on insulation)
Materials Required:
- The fan unit itself (see comparison table below)
- Appropriately rated electrical wire (typically 12-gauge for 20-amp circuit)
- Electrical box and cover
- Wire connectors and electrical tape
- Weatherstripping or foam seal (for whole house fan housing)
- Mounting hardware (usually included with fan)
- Roofing sealant or flashing (for roof-mounted units)
Step-by-Step Installation Walkthrough
Let’s get practical. Below is the core installation process for a whole house fan — the most impactful option for most homeowners. Attic-only fan installation follows a similar electrical process with a simpler mounting procedure.
Phase 1: Electrical Preparation (Safety First)
Step 1: Turn off the circuit at the breaker panel. Use a non-contact voltage tester to confirm power is off before touching any wiring. This is non-negotiable.
Step 2: Plan your circuit. Most whole house fans require a dedicated 20-amp, 120V circuit. If you’re adding a new circuit, this is typically where a licensed electrician adds the most value — running wire from your panel through walls and ceilings safely. Budget $150–$350 for this portion if hiring out.
Step 3: Install the wall switch box at your chosen location (typically near the main entrance or hallway). Run 12-2 Romex from your panel to the switch location, then from the switch to the fan location in the ceiling.
Phase 2: Creating the Ceiling Opening
Step 4: Locate your installation point using the stud finder. Mark the center point of the ceiling opening. Most whole house fans require an opening between ceiling joists — confirm your fan’s rough opening dimensions against your joist spacing (typically 16″ or 24″ on center).
Step 5: Cut the opening. Use a drywall saw or jigsaw to cut along your marked lines. Work carefully — this opening is permanent. If your fan requires a wider opening than a single joist bay provides, you’ll need to install a header beam between joists, which adds complexity but is manageable for most handy homeowners.
Step 6: From the attic side, verify clearance around the opening. You need at least 6 inches of clearance between the fan housing and any insulation for proper operation and fire code compliance. Use insulation baffles to redirect blown-in insulation if needed.
Phase 3: Mounting the Fan
Step 7: Assemble the fan housing according to manufacturer instructions (they vary by brand — QuietCool, Tamarack, and Broan all have slightly different systems in 2026).
Step 8: Set the housing into the ceiling opening from above (attic side) and secure it to the joists with the provided mounting brackets. Ensure it sits level — an unlevel fan vibrates and is significantly louder.
Step 9: Apply weatherstripping around the louver frame on the ceiling side. This is critical for winter efficiency — a whole house fan without a proper air seal leaks as much heated air as a broken window.
Phase 4: Electrical Connection
Step 10: Connect the fan wiring following the wiring diagram in your manual. Standard configuration: black (hot) to black, white (neutral) to white, green or bare copper (ground) to ground. Secure all connections with wire nuts and wrap with electrical tape.
Step 11: Connect your wall switch. For variable-speed fans, this typically involves a multi-speed switch or a smart controller. QuietCool’s 2025/2026 smart controller line integrates directly with home automation platforms including Apple HomeKit and Google Home.
Step 12: Restore power and test. Run the fan on all speed settings, listening for unusual vibration or noise. Check that all windows and doors in the test area are open at least 6 inches for each 1,000 CFM of fan capacity to ensure adequate makeup air.
Common Challenges and How to Overcome Them
Real installations rarely go perfectly. Here are the three most common roadblocks and proven solutions:
Challenge 1: Insufficient Attic Ventilation
This is the number-one reason whole house fans underperform. Your fan exhausts air into the attic, and that air has to escape through your roof vents. If the ventilation ratio is too tight, you create positive pressure in the attic that reduces the fan’s effectiveness and can even backdraft combustion appliances.
Solution: Calculate your net free area (NFA) of existing vents. Most fan manufacturers require 1 sq ft of NFA per 750 CFM of fan capacity. Adding soffit vent inserts (approximately $3–6 each at hardware stores) is the simplest and cheapest fix. Ridge vent upgrades are more effective but require roof work.
Challenge 2: Noise and Vibration Problems
Traditional belt-driven whole house fans from the 1970s–1990s earned a reputation for being louder than a helicopter. Modern direct-drive and variable-speed fans have dramatically changed this. If your installation is producing excessive noise, the most common culprits are:
- Fan not seated level — recheck and shim if needed
- Loose mounting hardware — retorque all fasteners
- Louvered panels not moving freely — check for paint or debris obstruction
- Fan operating without adequate makeup air (windows) — creates pressure and rattling
Challenge 3: Existing Insulation Conflict
If your attic has blown-in insulation (common in homes insulated or re-insulated between 2018–2025 as part of energy efficiency upgrades), it will shift around the fan housing and potentially block airflow or contact the motor housing, creating a fire hazard.
Solution: Install a rigid insulation dam around the fan housing — a simple rectangular frame made from 2×6 lumber or rigid foam board, extending at least 2 inches above the insulation level, prevents contact while maintaining your attic’s R-value on all sides.
Attic Fan Types: A Side-by-Side Comparison
| Fan Type | Avg. Cost (2026) | CFM Range | Energy Use | Best For |
|---|---|---|---|---|
| Whole House Fan (Direct Drive) | $300–$650 | 3,000–7,000 | 200–600W | Whole home cooling, mild climates |
| Solar Attic Fan | $280–$550 | 800–1,600 | 0W (solar) | Off-grid, low maintenance, HOA-friendly |
| Gable-Mounted Power Vent | $120–$280 | 1,000–1,500 | 75–250W | Attic-only ventilation, easy install |
| Roof-Mounted Power Vent | $180–$350 | 1,000–1,600 | 90–300W | Homes without gable ends, maximum extraction |
| Smart/Variable Speed WHF | $550–$1,100 | 4,000–6,000 | 100–450W | Smart homes, climate zone flexibility, quiet operation |
Energy Savings and ROI: What the Numbers Say in 2026
Let’s talk about the financial reality — because that’s often the deciding factor. With average residential electricity rates hitting $0.17/kWh nationally in 2026 (up from $0.16 in 2024), the math on attic fans has never been more compelling.
Real-World Case Study: The Hernandez Family, Phoenix, Arizona
Maria and Carlos Hernandez installed a 5,000 CFM direct-drive whole house fan in their 2,200 sq ft home in April 2025. Their previous summer cooling bill averaged $280/month (June–September). After installation, they used their central AC only during peak afternoon hours (1–5 PM), relying on the whole house fan for morning and evening cooling. Their 2025 cooling season average dropped to $148/month — a 47% reduction. Total installation cost including permit and electrician: $780. Payback period: approximately 14 months.
Real-World Case Study: Solar Fan Retrofit, Atlanta, Georgia
David Okonkwo installed two solar-powered gable fans in his 1,800 sq ft Cape Cod in June 2025. No electrician needed, no permit required (under his local jurisdiction), and zero ongoing electricity cost. Before installation, his attic measured 152°F on peak summer afternoons; after, measurements dropped to within 15°F of outdoor ambient temperature. His central AC runtime dropped by an estimated 2.5 hours daily during summer, saving roughly $95/month during peak season. Total cost: $620. Payback: 6.5 months.
Annual Energy Savings Potential — Visualization
Annual Cooling Cost Reduction by Fan Type (Avg. 2,000 sq ft home, mixed climate zone)
$420/yr
$340/yr
$230/yr
$150/yr
$120/yr
Note: Savings vary significantly by climate zone, utility rate, and usage patterns. Whole house fan savings assume strategic operation during favorable outdoor temperature windows.
Optimizing Performance for Maximum Whole House Cooling
Installation is only half the equation. How you operate your system determines whether you maximize your investment or leave significant cooling potential on the table.
The Optimal Operating Window Strategy
Whole house fans deliver their best results during a specific outdoor temperature window: below 75°F. Run yours aggressively during early morning hours (5–9 AM) when outdoor air is coolest. This pre-cools your home’s thermal mass — walls, floors, furniture — reducing heat gain during peak afternoon hours even after you close windows and switch to AC.
- Trigger temperature: Start fan when outdoor temp drops below indoor temp + 5°F
- Window strategy: Open windows on the shaded, windward side of your home for best airflow
- Bedroom cooling: Close hallway doors briefly to direct airflow specifically into sleeping areas before bedtime
Smart Controls and Automation in 2026
The integration of whole house fans with smart home platforms has accelerated dramatically. Brands like QuietCool and Tamarack now offer fans with native Matter protocol support, meaning they work seamlessly across Apple Home, Google Home, and Amazon Alexa ecosystems without proprietary bridges.
A programmable schedule that activates your fan automatically at 5:30 AM and again at 8:00 PM — regardless of whether you remember — can recover another 10–15% in cooling savings compared to manual-only operation. Pair this with an outdoor temperature sensor, and the system becomes truly intelligent, only running when outdoor conditions are favorable.
Frequently Asked Questions
Can I install an attic fan myself, or do I need a licensed electrician?
For solar-powered attic fans, most homeowners can complete the installation without an electrician — it’s largely mechanical work with no grid electrical connection. For whole house fans or hardwired attic power vents, you’ll need to connect to your home’s electrical system. If you’re comfortable working with residential wiring and have basic experience, the fan connection itself (after the circuit is run) is straightforward. However, running a new dedicated circuit from your panel should be handled by a licensed electrician in most states. In 2026, electrician rates average $85–$140/hour — a new circuit typically takes 3–5 hours total, including the panel connection.
Will a whole house fan work if I have central air conditioning?
Absolutely — and this is one of the most common misconceptions about whole house fans. They’re not replacements for central AC; they’re strategic complements. The key rule is simple: never run your whole house fan at the same time as your central AC. They work in opposition — your AC is trying to cool and dehumidify recirculated indoor air, while the whole house fan is exhausting that conditioned air outside. The power combination is using the whole house fan during favorable outdoor temperature periods (evenings, early mornings) and your AC only during peak heat. Done right, many homeowners reduce their AC runtime by 40–60% through a single cooling season.
How long does attic fan installation typically take?
For a solar gable fan, most installations take 2–4 hours for a confident DIYer. For a whole house fan in a home with existing nearby wiring and good attic access, plan for 4–8 hours over a weekend. Complex installations involving new circuit runs, header beam installation for oversized fan openings, or difficult attic access (low-pitch roofs, extensive insulation) can extend to a full weekend project. Having a helper for the ceiling cutout and fan mounting phase significantly reduces time and frustration. The electrical inspection (if required by your permit) is typically scheduled within 5–10 business days of completing work in most jurisdictions.
Your Cool Home Action Plan: Next Steps
You now have everything you need to move from sweating over your energy bill to actually doing something about it. As climate adaptation becomes increasingly central to home ownership decisions in 2026 and beyond, strategic ventilation upgrades like attic fans are shifting from “nice to have” to essential infrastructure. The homeowners who act now lock in lower cooling costs for decades — not just the next season.
Here’s your implementation roadmap:
- This week: Measure your home’s square footage and calculate the CFM you need using the formulas in this guide. Decide whether a whole house fan or attic ventilation fan (or both) fits your situation.
- Next week: Call your local building department to confirm permit requirements. Get 2–3 quotes from licensed electricians for the circuit work if needed — pricing varies significantly by region.
- Week 3: Purchase your fan unit. Cross-reference the comparison table above with your budget and needs. Order online for best pricing (Amazon, Home Depot, and direct from manufacturers like QuietCool all offer competitive 2026 pricing).
- Installation weekend: Set aside a full Saturday morning for the mechanical work and Sunday for electrical finishing and testing. Have your building inspector scheduled for the following week.
- First operating season: Track your monthly electricity bills against the same months in 2025. Calculate your actual payback period. Then share your results — community knowledge compounds everyone’s decision-making.
Key takeaways to carry forward:
- Proper sizing is non-negotiable — an undersized fan delivers a fraction of the potential benefit
- Adequate attic ventilation must be confirmed before any fan installation
- The strategic operating window (outdoor temps below 75°F) is where real savings live
- Smart controls and automation recover an additional 10–15% savings on top of manual operation
- Both solar-only and whole house fan solutions pay back in under 2 years in most U.S. climate zones
As energy costs continue their upward trajectory and extreme heat events become more frequent, your home’s cooling strategy isn’t just a comfort decision — it’s a financial and resilience decision. An attic fan, properly chosen and expertly installed, is one of the highest-ROI investments available in home improvement today.
So here’s the question worth sitting with: What’s your home’s cooling cost going to look like in summer 2027 — and are you going to let that number surprise you again, or are you going to engineer a better outcome starting this weekend?
Article reviewed by Mike O’Brien, Drywall Installation & Surface Finishing Specialist, on July 15, 2026