Insulation upgrades that improve home comfort year round
Insulation Upgrades That Improve Home Comfort Year Round
Reading time: 12 minutes
Here’s a scenario most homeowners know all too well: You crank up the heat in January, but one corner of the living room stays stubbornly cold. Come August, the upstairs bedrooms become unbearable despite a working air conditioner. Your energy bills are climbing, yet comfort remains elusive. Sound familiar?
The culprit is almost never the HVAC system. It’s the invisible shell wrapped around your living space — your home’s insulation. And in 2026, with energy costs at record highs and climate extremes becoming the new norm, upgrading your insulation isn’t just a smart financial move. It’s one of the most impactful changes you can make for year-round comfort, indoor air quality, and long-term home value.
This guide cuts through the noise and gives you a clear, practical roadmap — whether you’re a first-time homeowner wondering where to start, or a seasoned renovator looking to maximize returns on your next upgrade.
Table of Contents
- Why Insulation Matters More Than Ever in 2026
- The 3 Most Common Insulation Problems (And Their Consequences)
- Types of Insulation Upgrades: What Works Where
- Key Areas to Target First
- Costs, Savings, and ROI: The Real Numbers
- Insulation Materials: Side-by-Side Comparison
- Real-World Case Studies
- DIY vs. Professional Installation
- Frequently Asked Questions
- Your Comfort Upgrade Roadmap: Next Steps
Why Insulation Matters More Than Ever in 2026
The conversation around home insulation has shifted dramatically. In 2025, the U.S. Energy Information Administration reported that residential energy expenditures reached an average of $2,200 per household annually — a 14% increase from 2022 figures. Meanwhile, the Department of Energy estimates that up to 40% of a typical home’s energy is lost through inadequate insulation and air leakage.
That’s not just a financial problem. It’s a comfort problem, a health problem, and increasingly, an environmental problem. Homes with poor thermal envelopes struggle to maintain consistent temperatures, create conditions for moisture and mold, and put excessive strain on HVAC equipment — shortening system lifespans and adding maintenance costs.
In 2026, federal incentives under the extended Inflation Reduction Act provisions continue to make insulation upgrades financially attractive, with homeowners eligible for tax credits covering up to 30% of installation costs for qualifying insulation materials and air sealing work. This has triggered a surge in upgrade projects, and for good reason.
“A well-insulated home is the foundation of energy efficiency. You can install the most advanced HVAC system on the market, but if the building envelope is leaking, you’re fighting a losing battle.” — Dr. Allison Bailes, building science consultant and author of A House Needs to Breathe… Or Does It?
The 3 Most Common Insulation Problems (And Their Consequences)
1. Inadequate R-Value for Your Climate Zone
R-value measures thermal resistance — the higher the number, the better the insulation’s ability to resist heat flow. Many homes built before 2000 have insulation that simply doesn’t meet today’s recommended standards for their climate zone. The DOE divides the U.S. into eight climate zones with specific R-value recommendations, and a surprising number of homes fall significantly short.
For example, a 1985-era home in Climate Zone 5 (covering cities like Chicago, Denver, and Boston) might have attic insulation rated at R-19. The current recommendation? R-49 to R-60. That gap translates directly into temperature swings, cold floors, drafty rooms, and heating bills that leave homeowners wincing.
2. Thermal Bridging
Even when insulation is present at the correct R-value, thermal bridging can undermine performance significantly. This occurs when a highly conductive material — typically wood framing or metal studs — creates a direct path for heat to bypass insulation. In a standard 2×6 stud wall, framing members can represent 15 to 25% of the wall area, and since wood conducts heat far better than insulation, the effective R-value of the assembly drops considerably.
Solutions like continuous exterior insulation boards (rigid foam or mineral wool) installed over the entire wall surface interrupt these thermal bridges and deliver noticeably more consistent interior temperatures.
3. Air Leakage — The Silent Thief
Here’s a truth many homeowners don’t realize: even perfectly rated insulation does very little to stop air movement. And air leakage is responsible for 25 to 40% of heating and cooling energy loss in most American homes. Gaps around electrical outlets, recessed light fixtures, attic hatches, plumbing penetrations, and rim joists allow conditioned air to escape and uncontrolled outdoor air to infiltrate — bringing humidity, allergens, and temperature extremes with it.
The fix is a combination approach: proper insulation paired with systematic air sealing. Ignoring one while addressing the other leaves significant performance gains on the table.
Types of Insulation Upgrades: What Works Where
Spray Foam Insulation
Spray polyurethane foam (SPF) comes in two varieties: open-cell and closed-cell. Closed-cell spray foam is the high-performer of the insulation world — it achieves R-values of approximately R-6 to R-7 per inch, acts as both an insulator and an air barrier, and adds structural rigidity to walls. It’s the go-to choice for rim joists, crawl spaces, and unvented attic assemblies.
Open-cell foam is softer, less expensive, and provides excellent air sealing at a lower R-value (around R-3.5 per inch). It’s commonly used in interior wall cavities and open attic applications where sound dampening is also a priority.
The trade-off? Cost. Closed-cell spray foam typically runs $1.50 to $3.00 per board foot installed — significantly more than fiberglass or cellulose. But in the right application, the performance justifies the investment.
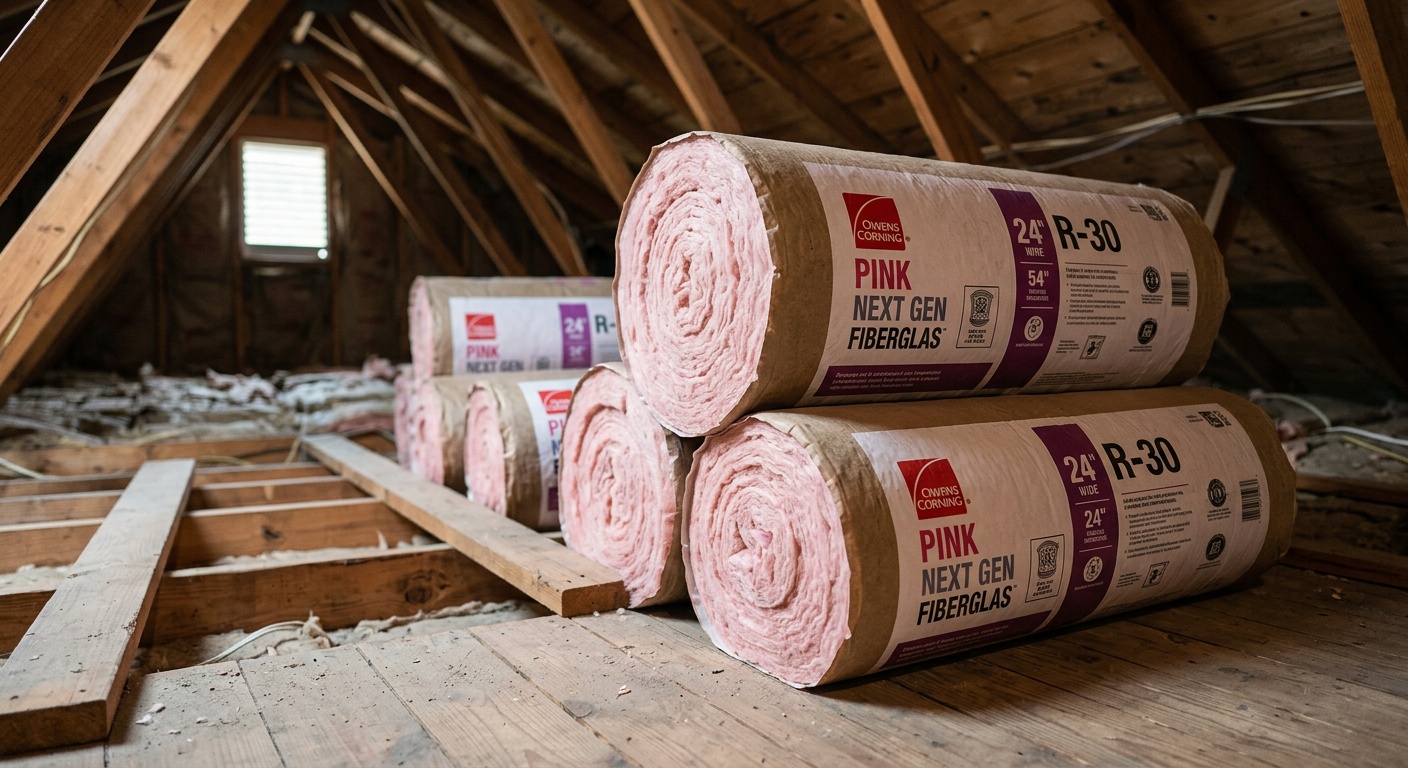
Blown-In Cellulose and Fiberglass
Blown-in insulation remains one of the most cost-effective ways to increase attic R-value quickly. Cellulose, made from recycled paper treated with fire retardant, achieves around R-3.2 to R-3.8 per inch and is particularly good at filling irregular spaces and minimizing air movement within the insulation layer. Blown-in fiberglass performs similarly and is preferred in environments with high moisture risk.
A professionally blown attic insulation job can often be completed in a single day and delivers immediate, measurable comfort improvements. For existing homes, this is frequently the highest-ROI first step.
Rigid Foam Board Insulation
Available in EPS (expanded polystyrene), XPS (extruded polystyrene), and polyisocyanurate forms, rigid foam boards are the workhorse of continuous insulation strategies. They’re used on exterior walls, under slab foundations, basement walls, and as thermal breaks in roof assemblies.
Polyisocyanurate (polyiso) offers the highest R-value per inch at approximately R-6.5, though its performance can decrease in very cold temperatures. XPS is highly moisture-resistant and stable at R-5 per inch, making it a popular choice for below-grade and foundation applications.
Mineral Wool (Rockwool) Batts and Boards
Mineral wool has seen a significant resurgence in popularity through 2025 and into 2026, and for good reason. Made from volcanic rock or industrial slag, it offers R-3.7 to R-4.2 per inch, excellent fire resistance (it doesn’t melt until temperatures exceed 1,000°C), superior sound absorption, and inherent moisture resistance. It’s available in both batt form for standard stud cavities and rigid board form for continuous exterior applications.
Many building professionals now consider mineral wool the best all-around upgrade material for remodeling projects where fire safety, acoustic performance, and moisture durability are priorities alongside thermal performance.
Key Areas to Target First
Not all insulation upgrades are created equal in terms of impact. Here’s where to focus your attention and budget for maximum comfort and efficiency gains:
- Attic and Roof Assembly: Heat rises, and in most homes, the attic is the single largest source of heat loss in winter and heat gain in summer. This is almost always the highest-priority upgrade. Target minimum R-38, ideally R-49 to R-60 in cold climates.
- Rim Joists and Band Joists: These often-overlooked areas where the floor system meets the foundation wall are typically uninsulated and full of air gaps. Spray foam here delivers outsized results for the area treated.
- Basement and Crawl Space Walls: Uninsulated below-grade spaces drag down floor temperatures and create ideal conditions for moisture problems. Rigid foam or closed-cell spray foam on foundation walls transforms these spaces.
- Exterior Walls: The most disruptive and expensive upgrade — but also highly impactful, especially in older homes with no wall insulation or minimal batt insulation. Options range from dense-pack blown-in through small holes to exterior continuous insulation during re-siding projects.
- Air Sealing Throughout: Before or alongside insulation upgrades, a systematic air sealing pass — targeting attic bypasses, electrical penetrations, plumbing chases, and attic hatches — amplifies the performance of every other measure.
Costs, Savings, and ROI: The Real Numbers
Let’s talk dollars and sense. According to 2025-2026 cost data from the North American Insulation Manufacturers Association (NAIMA) and HomeAdvisor’s 2026 Cost Report:
- Attic insulation upgrade (blown-in, 1,500 sq ft): $1,500–$3,500 installed. Average energy savings: $400–$700 per year. Payback period: 3–6 years.
- Rim joist air sealing and insulation: $500–$1,500. Energy savings contribution: $150–$300 per year when combined with other measures.
- Basement wall insulation (full perimeter, spray foam): $2,500–$5,000. Comfort improvement is often dramatic — cold floors above become noticeably warmer.
- Full exterior continuous insulation (during re-siding): $4,000–$12,000 depending on home size and material. Payback 8–15 years, but comfort and moisture management benefits are substantial.
With the 2026 federal tax credit of 30% (up to $1,200 for insulation and air sealing combined under the Energy Efficient Home Improvement Credit), real out-of-pocket costs are meaningfully reduced. Many states layer additional rebates on top — making some attic insulation projects effectively free for qualifying income levels.
Insulation Materials: Side-by-Side Comparison
| Material | R-Value per Inch | Air Sealing Ability | Avg. Cost (Installed) | Best Application |
|---|---|---|---|---|
| Closed-Cell Spray Foam | R-6 to R-7 | Excellent | $1.50–$3.00/bd ft | Rim joists, crawl spaces, unvented attics |
| Blown-In Cellulose | R-3.2 to R-3.8 | Moderate | $0.60–$1.20/sq ft | Attic floors, wall dense-pack |
| Mineral Wool Board | R-3.7 to R-4.2 | Low (requires separate air barrier) | $1.00–$2.00/sq ft | Exterior walls, fire-rated assemblies |
| XPS Rigid Foam | R-5 | Good (when taped) | $0.80–$1.60/sq ft | Below-grade, under-slab, foundation walls |
| Fiberglass Batts | R-3.1 to R-4.3 | Poor (requires separate air sealing) | $0.40–$1.00/sq ft | New construction walls, attic floors |
Energy Loss Sources: Where Your Home Hemorrhages Heat
Understanding where energy escapes helps prioritize your upgrade strategy. Here’s a breakdown of average heat loss distribution in a typical pre-2000 American home:
38%
24%
18%
12%
8%
Source: U.S. Department of Energy, 2025 Residential Energy Efficiency Data. Note: Air infiltration occurs across all zones but is shown separately for independent leakage paths.
Real-World Case Studies
Case Study 1: The 1978 Ranch Home in Minneapolis, Minnesota
David and Karen T. purchased a 1,800-square-foot ranch home in a Minneapolis suburb in 2023. The home had original fiberglass batt insulation throughout — approximately R-11 in the walls and a sparse R-19 in the attic. Their gas heating bills averaged $320 per month during the winter, and despite having a newer furnace, they consistently experienced cold floors and a drafty master bedroom in the northeast corner of the house.
In spring 2025, after a professional energy audit identified the rim joists and attic as critical weak points, they invested in a targeted upgrade package: closed-cell spray foam on all rim joists ($1,200), blown-in cellulose in the attic to bring it to R-55 ($2,800), and comprehensive air sealing of attic bypasses ($600). Total investment: $4,600, reduced to $3,220 after the 30% federal tax credit.
The results? Their average winter heating bill dropped to $198 per month — a 38% reduction. More importantly to them: the master bedroom is now uniformly comfortable, and their hardwood floors no longer feel cold underfoot. David reports the home “feels like a completely different house” in winter 2025-2026. Projected full payback: 4.2 years.
Case Study 2: The 2001 Two-Story Colonial in Atlanta, Georgia
Maria S. in Atlanta had the opposite problem — insufferable summer heat, particularly on the second floor, despite a functioning central air system. A home energy audit in early 2025 revealed that her unconditioned attic was reaching temperatures of 145°F on peak summer days, radiating heat into the living spaces below. The existing blown-in fiberglass had settled to an effective R-15 — well below the R-38 to R-60 recommended for Climate Zone 3.
Maria chose a different solution than simply adding more insulation to the attic floor. She opted for a spray foam unvented attic assembly — closed-cell foam applied directly to the underside of the roof deck, converting the attic into conditioned space. The investment was higher ($6,500) but transformed the attic from a liability into a thermal buffer zone. The HVAC system now runs significantly less, the second-floor bedrooms maintain consistent temperatures, and the attic is now usable storage space year round.
Her cooling costs dropped by 31% in summer 2025, and she reports eliminating the practice of closing off the second floor during July and August — a quality-of-life improvement she describes as “completely transformative.”
DIY vs. Professional Installation: Making the Right Call
Not every insulation upgrade requires a contractor, but not every upgrade is suitable for DIY. Here’s an honest breakdown:
Reasonable DIY territory:
- Adding batt insulation to an open, accessible attic floor
- Installing rigid foam in a basement wall (with appropriate fire protection)
- Air sealing accessible gaps with canned spray foam and caulk
- Weatherstripping doors and windows
Leave it to the professionals:
- Spray foam application (requires specialized equipment, protective gear, and precise mixing ratios)
- Dense-pack wall insulation (requires a blower door test and proper netting or drill-and-fill technique)
- Unvented attic assemblies (moisture management expertise is essential)
- Any insulation work near knob-and-tube wiring (fire hazard — always consult an electrician first)
Pro Tip: Before any significant insulation project, invest $300–$600 in a professional energy audit with blower door test. This diagnostic tells you exactly where your home is losing energy, quantifies air leakage, and helps you prioritize upgrades for maximum return. Many utility companies offer subsidized or free audits in 2026 — check your provider’s website or the ENERGY STAR Home Advisor tool.
Frequently Asked Questions
How do I know if my home’s insulation is actually inadequate without hiring an auditor?
There are several telling signs you can identify yourself. If your upstairs rooms are significantly warmer than downstairs in summer, or if you have rooms that never quite reach the temperature on your thermostat in winter, insulation deficiencies are likely. Check your attic with a ruler — if your insulation depth is less than 10 inches, you’re almost certainly below recommended R-values for most U.S. climate zones. Ice dams forming at roof eaves in winter are a classic indicator of heat escaping through an under-insulated attic. High and inconsistent utility bills, drafts near outlets and switch plates on exterior walls, and pipes that freeze in cold snaps are all additional red flags. That said, a professional blower door test remains the gold standard for quantifying air leakage and pinpointing exactly where your home’s thermal envelope is underperforming.
Can insulation upgrades really make a difference in a home that already has some insulation?
Absolutely — and this is one of the most common misconceptions homeowners have. “Some insulation” rarely means “adequate insulation.” The difference between R-19 and R-49 in an attic is enormous in terms of thermal performance, and even well-insulated spaces often have significant air leakage pathways that render the insulation less effective than its rated value. A 2024 Lawrence Berkeley National Laboratory study found that even homes built after 2000 to code frequently showed 20 to 35% energy reduction potential through targeted insulation and air sealing upgrades. Adding insulation on top of existing material is usually straightforward and cost-effective, particularly in attics. The key is addressing the combination of thermal resistance and air sealing together — neither alone delivers the full benefit.
Are there health or indoor air quality concerns with spray foam insulation?
This is a valid and important question. During installation, spray foam releases isocyanate compounds and other chemicals that are hazardous to breathe — professional installers use supplied-air respirators and full protective gear for this reason. Homeowners and occupants should vacate the premises during installation and for a curing period of typically 24–72 hours depending on product type and ventilation. Once fully cured, spray foam is generally considered inert and safe. In 2026, low-GWP (global warming potential) formulations have become increasingly available and are now required under several state regulations, addressing previous environmental concerns about blowing agents. If you have chemical sensitivities, discuss your concerns with the contractor and ask specifically about low-VOC formulations and extended off-gassing timelines before scheduling work.
Your Comfort Upgrade Roadmap: Start This Season
You don’t need to tackle everything at once. Smart insulation upgrades are about strategic sequencing — maximizing impact per dollar invested while building toward a comprehensively comfortable, efficient home. Here’s your practical action plan:
- Get a professional energy audit (this month). Spend the $300–$600 to know exactly what you’re dealing with. A blower door test with thermal imaging removes all guesswork and gives you a prioritized upgrade list specific to your home. Many utilities currently offer rebates that reduce this cost to zero.
- Address attic insulation and air sealing first. This is almost always the highest-ROI move. Schedule this before next heating or cooling season for immediate bill reduction and comfort improvement.
- Tackle rim joists and basement/crawl space next. These targeted spray foam applications are relatively low-cost, can often be completed in a day, and deliver disproportionate comfort improvements — especially cold floors and drafty lower-level rooms.
- Plan exterior wall upgrades strategically. If your siding is due for replacement in the next two to three years, plan now to incorporate continuous exterior insulation at that time. This is the lowest-disruption window for this high-impact upgrade.
- File for your tax credits and utility rebates. Keep all receipts, contractor invoices, and product specifications. The 30% federal tax credit under the Energy Efficient Home Improvement Credit applies to qualifying insulation and air sealing costs — don’t leave money on the table.
As building codes tighten and energy costs continue their upward trajectory into 2027 and beyond, homes with strong thermal envelopes will command premium resale values and attract buyers looking for predictable operating costs. The 2026 real estate data already shows a measurable correlation between ENERGY STAR certification and sale price premiums in competitive markets.
Here’s the bottom line, and it’s directed squarely at you: your home’s comfort isn’t a luxury — it’s a function of physics. Fix the physics, and everything else follows. Which zone of your home have you been tolerating as “just always cold” or “always hot”? That’s where your upgrade story begins.
Article reviewed by Mike O’Brien, Drywall Installation & Surface Finishing Specialist, on June 8, 2026